Transaction & Tokenchain Search
The Rubix Explorer makes it simple to trace the lifecycle of both transactions and tokenchains.
Transaction Search
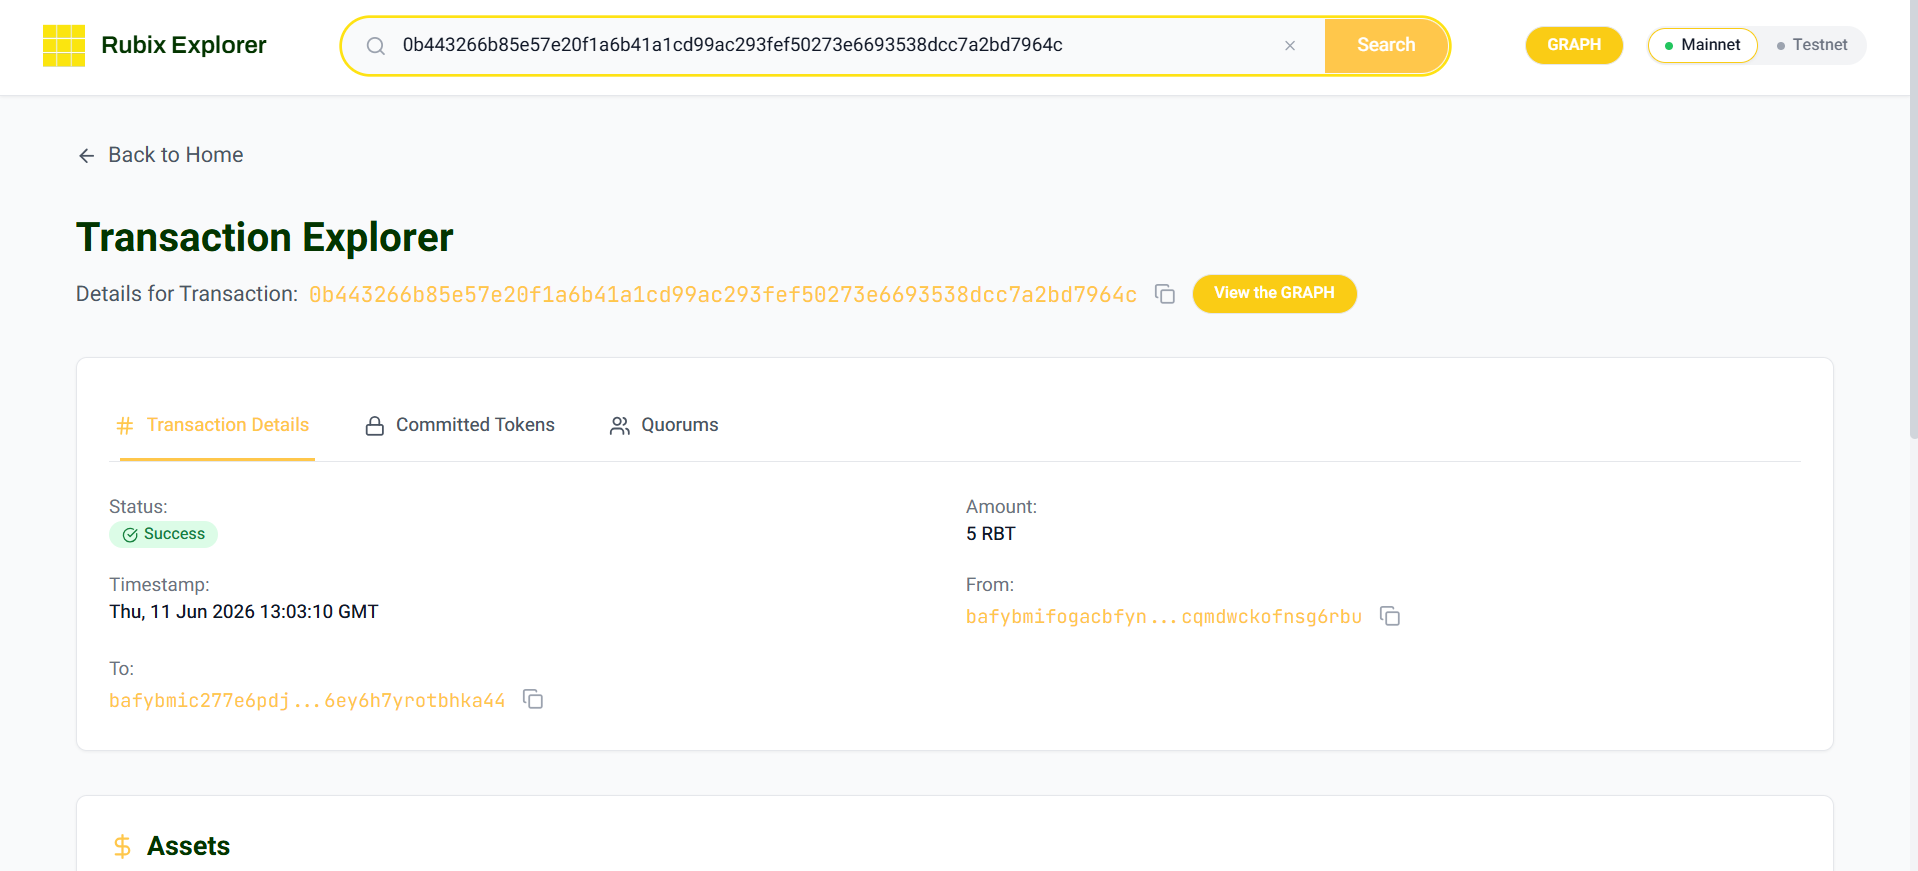
To explore a transaction, open the Rubix Explorer (or the Testnet Explorer for testnet transactions), paste the Transaction ID into the search bar, and hit Enter.
The result opens in the Transaction Explorer, organised into tabs.
The Transaction Details tab shows the status (Success or Failed), amount, timestamp, and the sender (From) and receiver (To) DIDs:
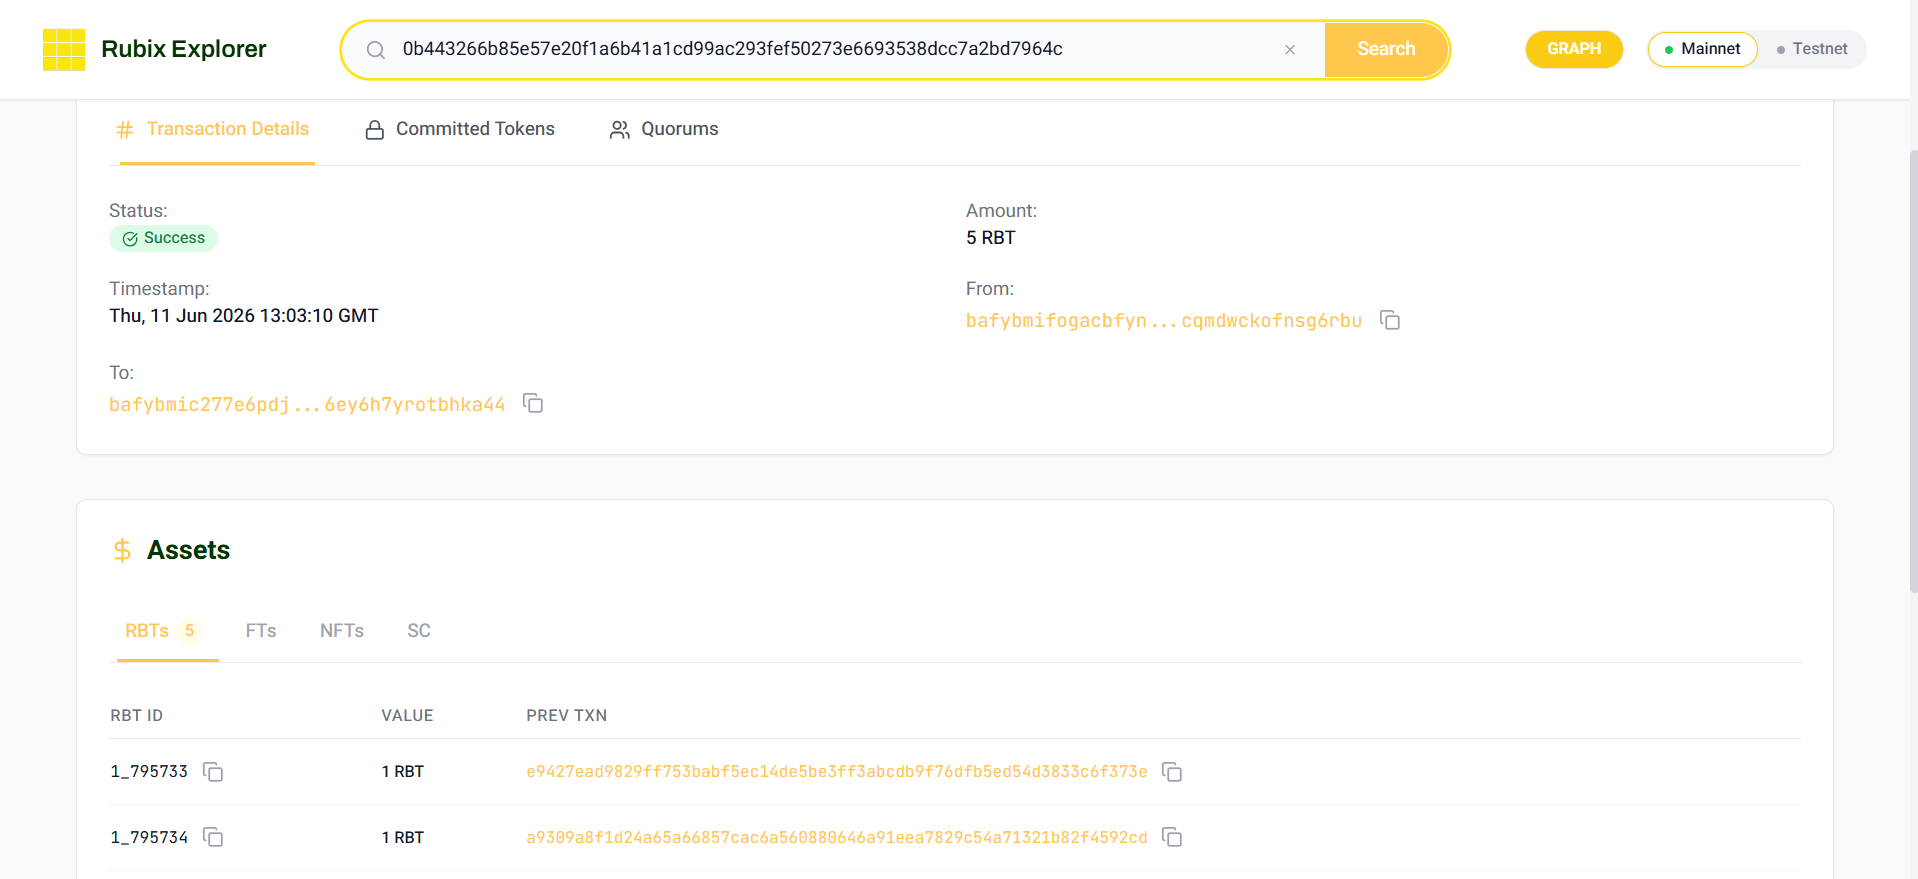
The transaction's committed tokens are listed in the Assets section (RBTs, FTs, NFTs, and SC), each with its ID, value, and previous transaction:
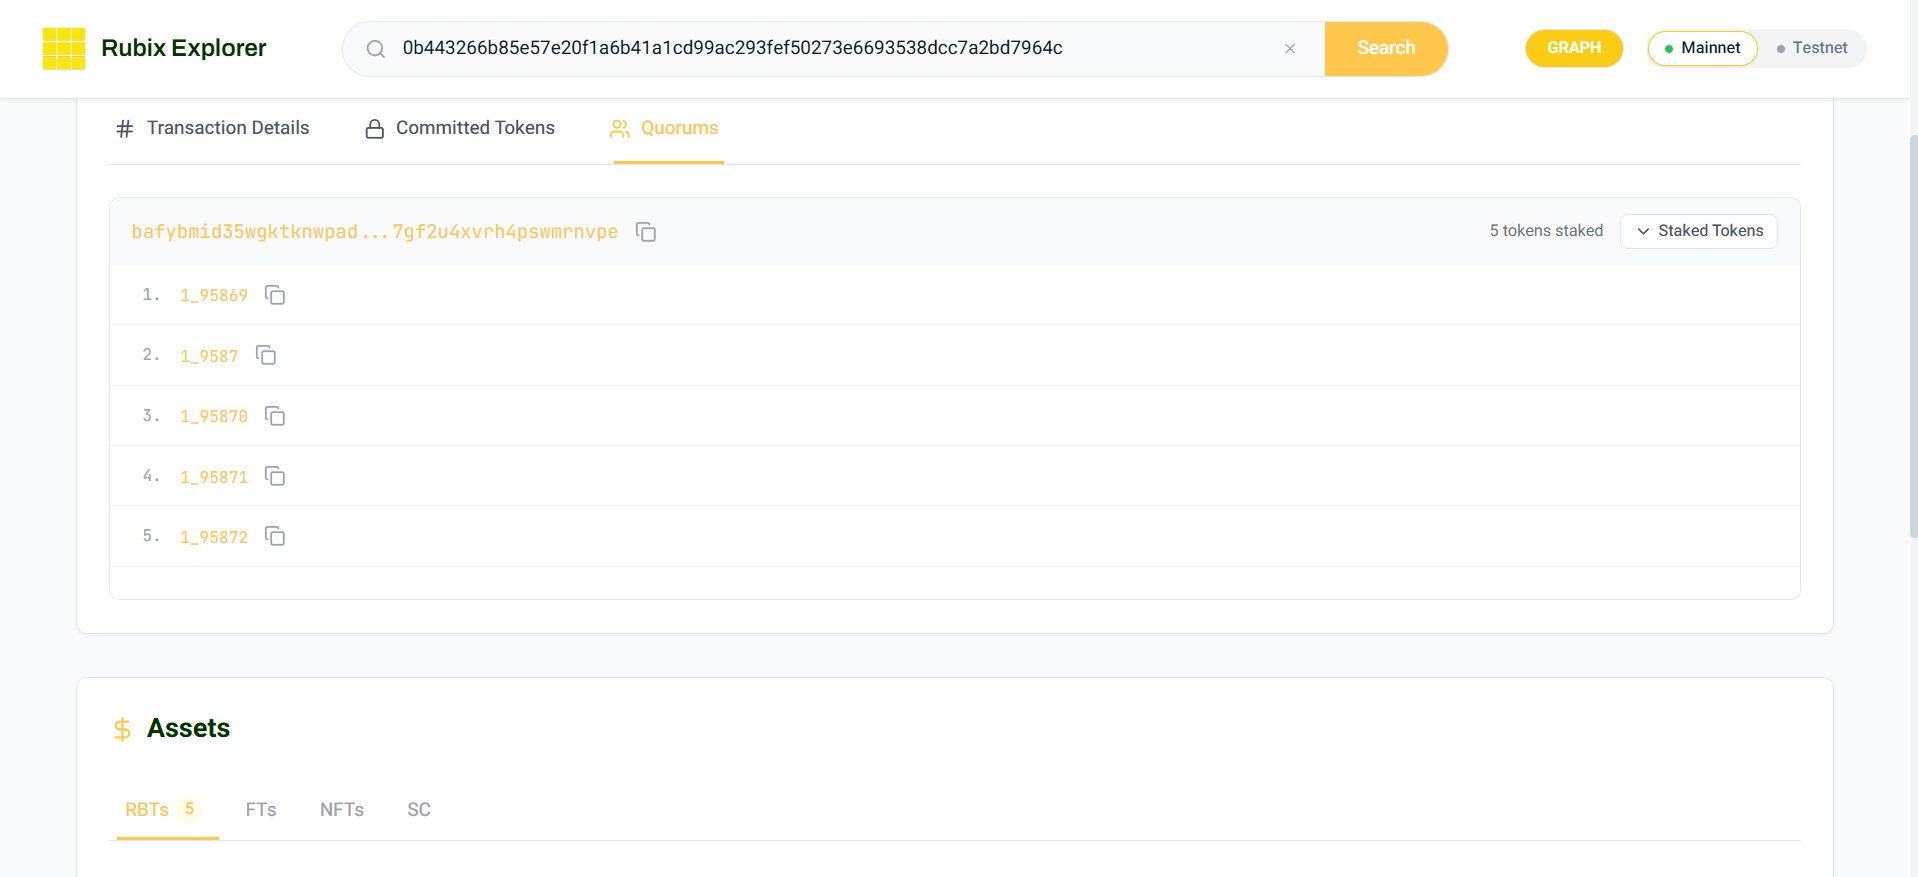
The Quorums tab shows the validating quorum's DID and the tokens it pledged for the transaction:
Tokenchain Search
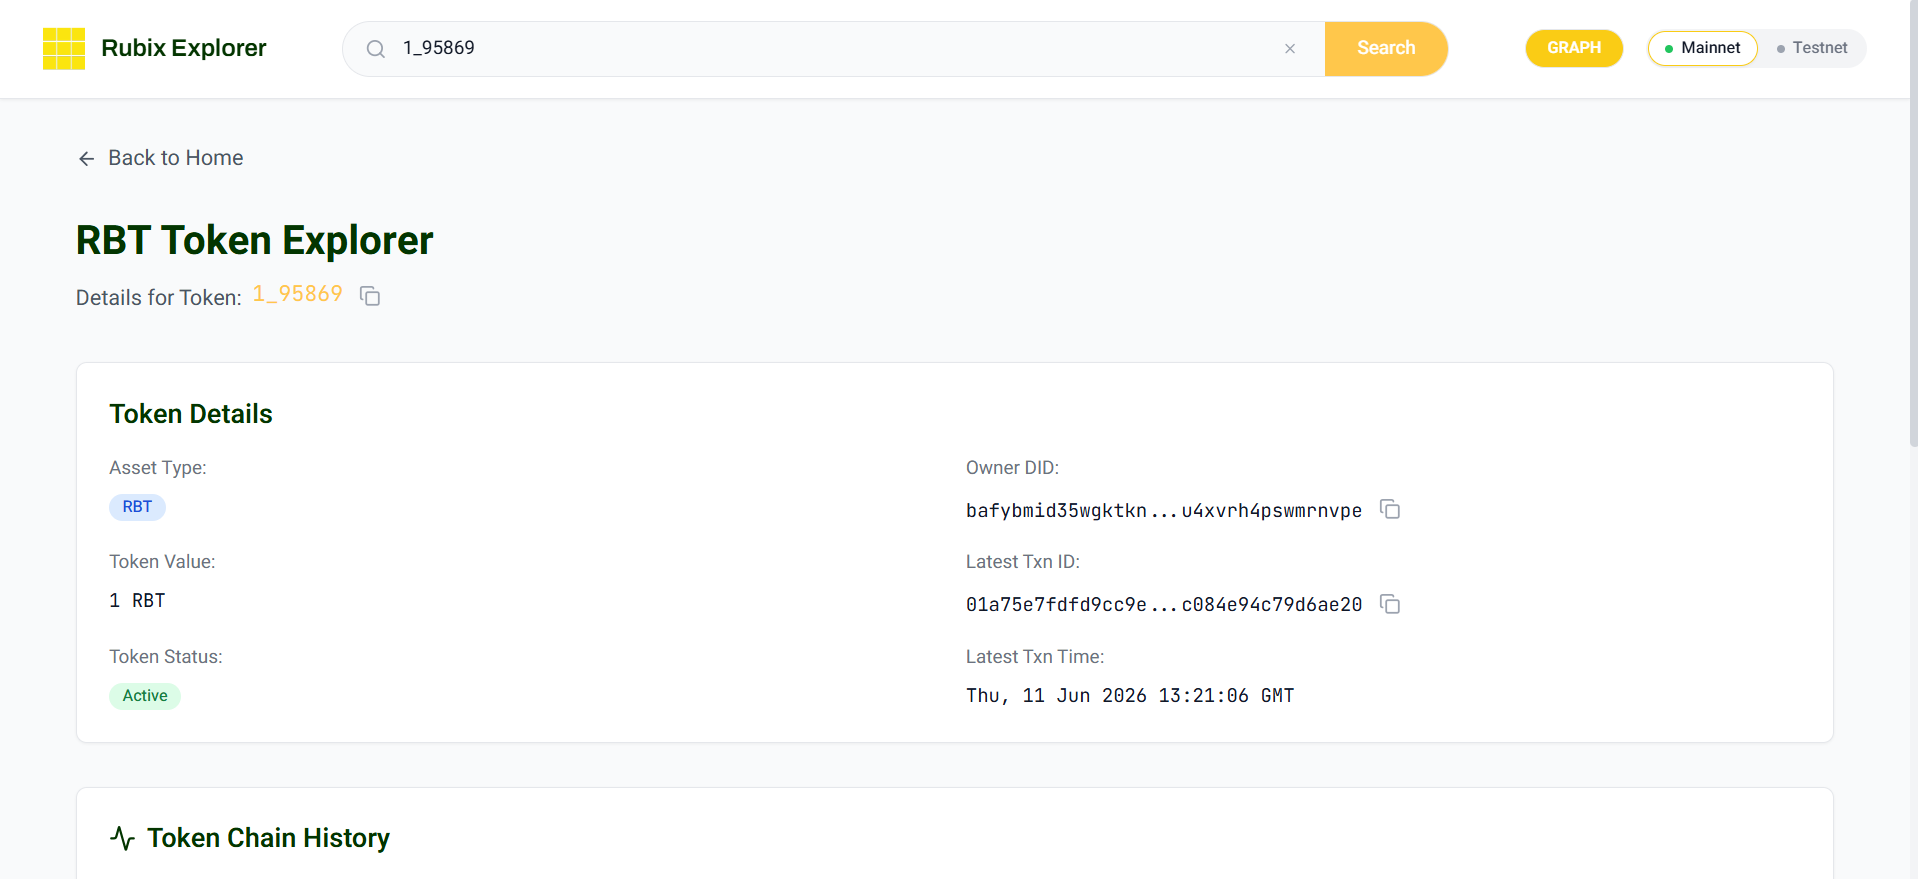
For tokenchains, enter a Token ID instead of a transaction ID. The RBT Token Explorer page opens.
The Token Details section shows the asset type, value, status, current Owner DID, and the latest transaction ID and time:
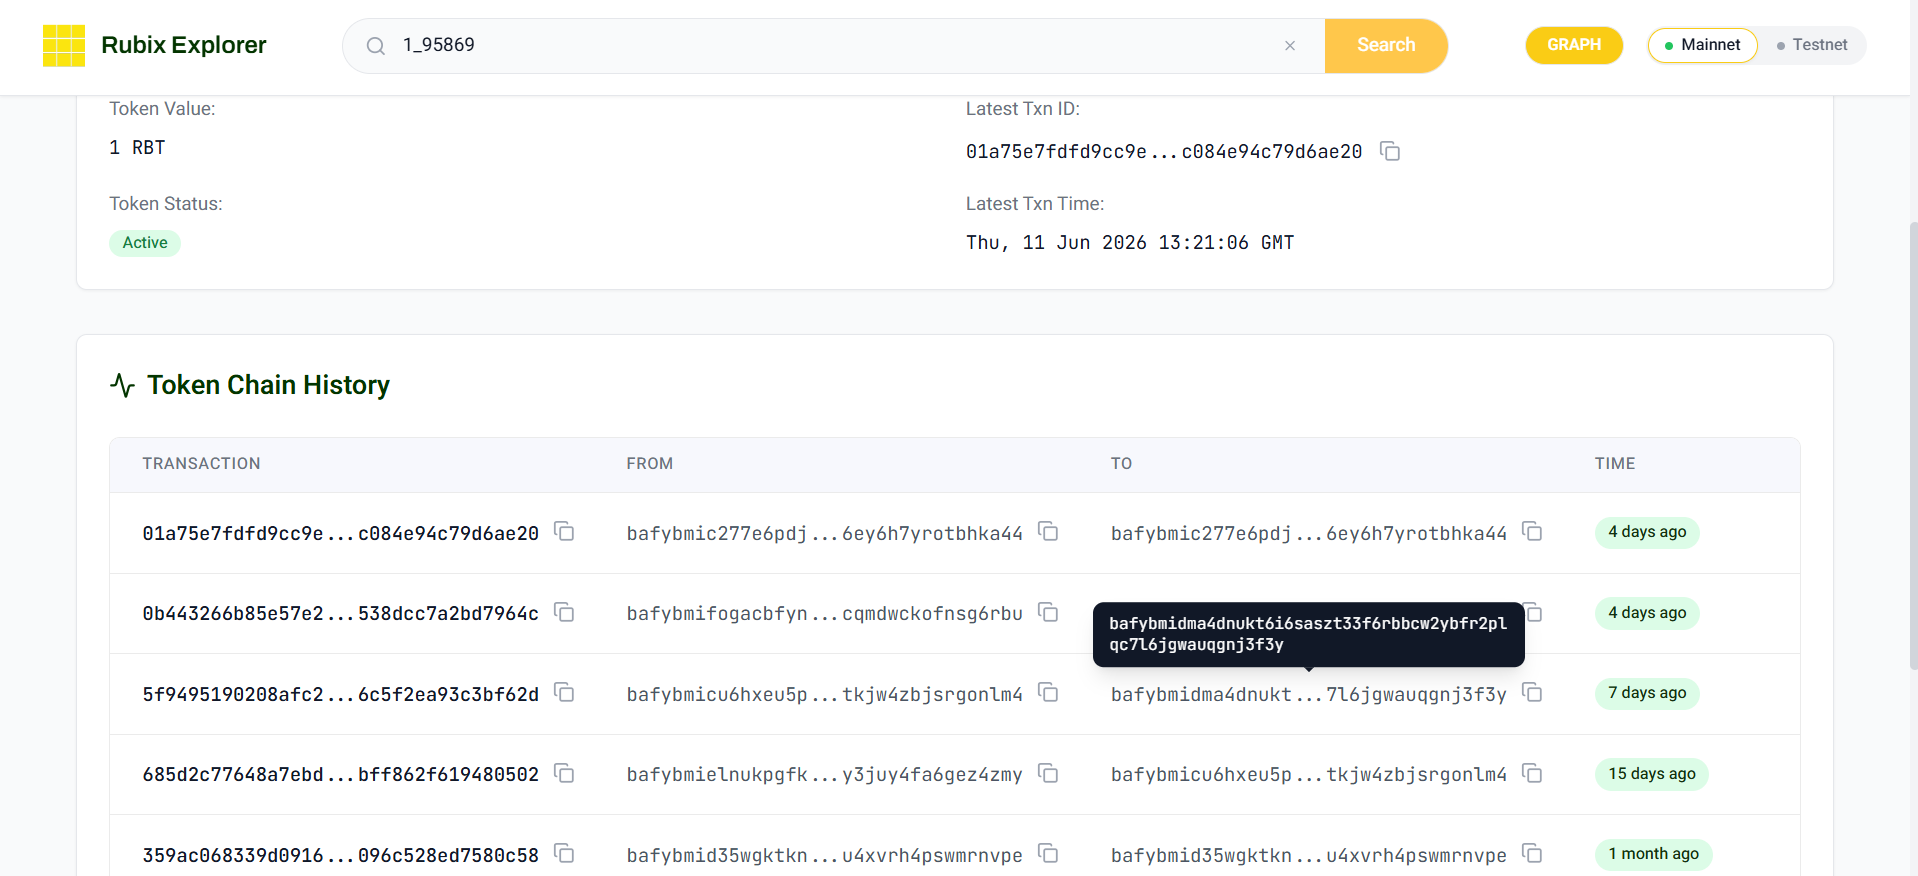
Below it, Token Chain History lists every transaction involving the token, with the sender, receiver, and timestamp for each, giving its full ownership lineage:
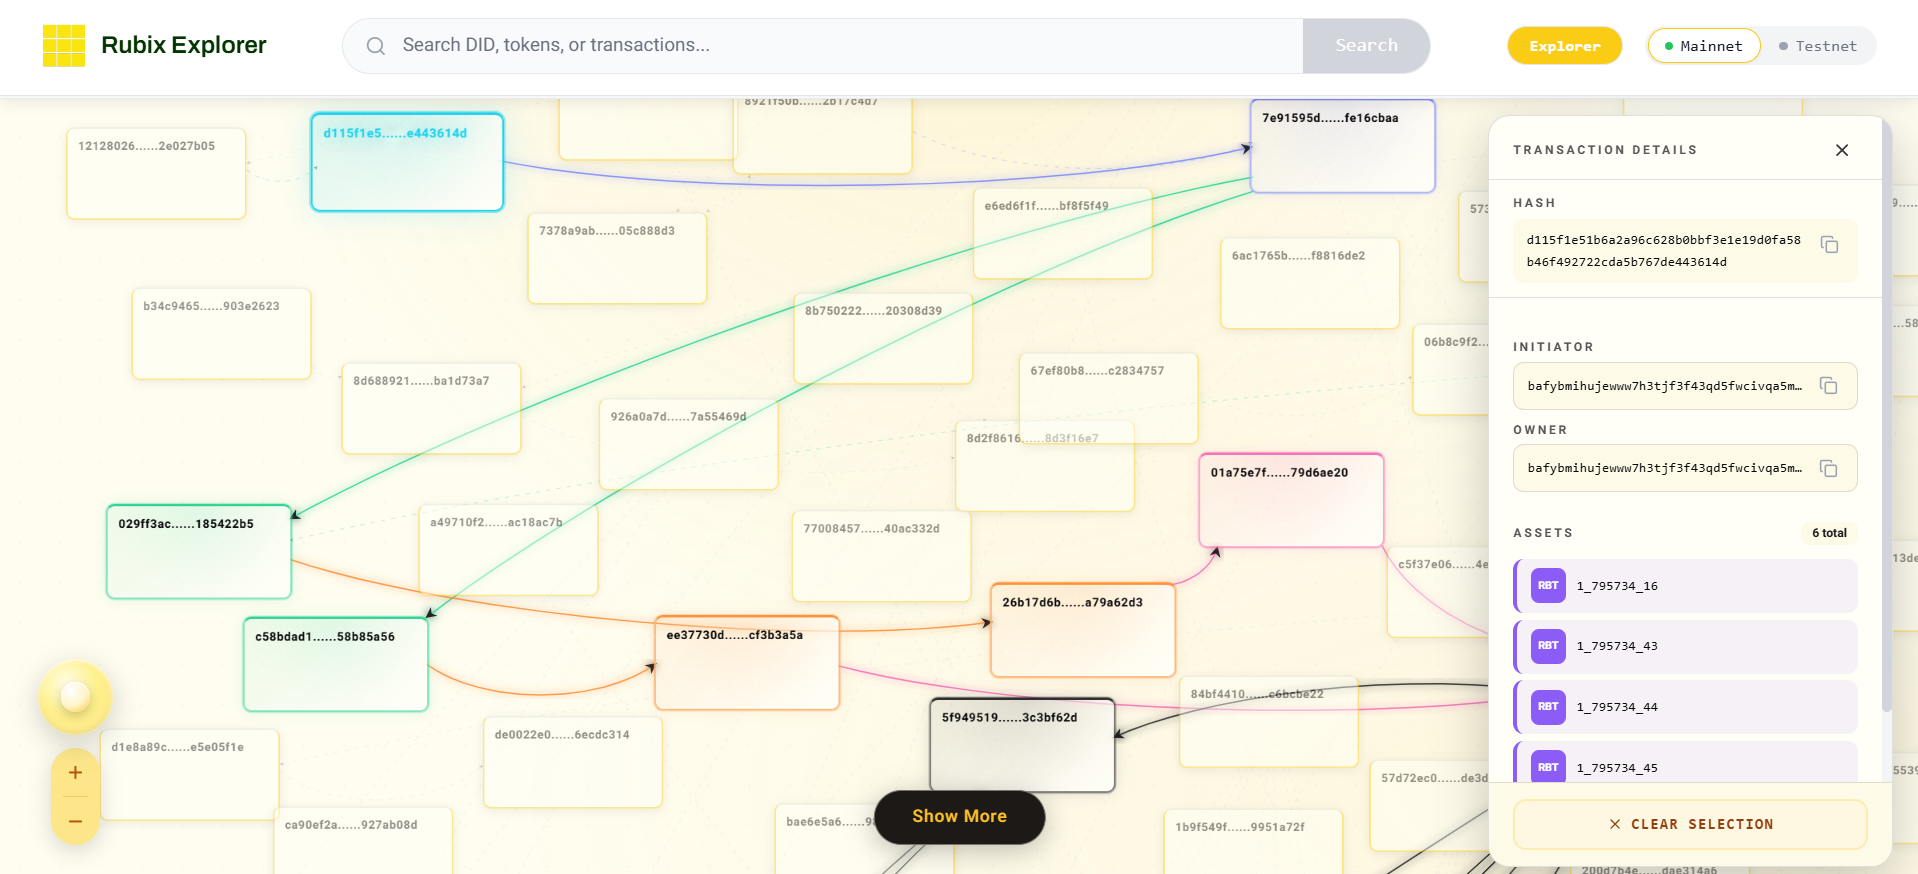
Graph (DAG) View
The Explorer can also show transactions as a graph, the Rubix transaction DAG. Each transaction is a node, and the nodes are linked through tokens: as shown in the Assets above, every transaction records each token's previous transaction. Each of those back-references is an edge to the earlier transaction that last touched the same token, so following the edges traces a token's full history, and together they form the graph.
Open it with the GRAPH button in the Explorer, or at explorer.rubix.net/dag (testnet: testnetexplorer.rubix.net/dag). Select any transaction to see its place in the graph and how it links to the transactions around it.