Setting Up a Validator Node
Setting Up a Validator Node
The Rubix Proof of Pledge (PoP) consensus mechanism is designed to be lightweight and distributed. It doesn't require energy-intensive mining or large-scale staking. This means that even basic computing nodes can act as validators. The sharded approach, where each validator only stores and maintains tokens for transactions they have validated, significantly reduces the required storage, computational load, and pledge amounts.
To get started, a validator needs to perform a few key steps:
1. Run your Rubix node
The foundation of being a validator is running a node on the network. First initialize the config and set network_mode = "mainnet" in config.toml, then start the node:
./rubixgoplatform init -p <node_name>
# edit <node_name>/config.toml and set network_mode = "mainnet"
./rubixgoplatform run -p <node_name>
You also need a Postgres container running for the node's database backend.
Refer to Running a Rubix Node for the complete setup, including the Postgres Docker command.
2. Generate and register your Decentralized Identity (DID)
Create your decentralized identity:
./rubixgoplatform createdid -port 20000
Refer to the DID Creation section for more details.
Publish your DID across the network by registering it:
./rubixgoplatform registerdid -did <did_created> -port <port_number>
3.Setup your DID to be a validator
Just by creating and register the DID will not make you a validator. Setup your DID to validate transactions by executing:
./rubixgoplatform setupquorum -did <did_created> -port <port_number>
You'll get a Quorum setup successfully message.
4.Get tokens for pledging
Get RBT tokens for pledging
For Mainnet:
Get RBT tokens for pledging in mainnet from below exchages:

For Testnet:
Visit Rubix Faucet below for getting test tokens. You can purchase a free Rubix test token in every hour.
- Go to the faucet webpage.
- Enter your DID to receive test tokens.
Setting Up a Validator Node in Subnet
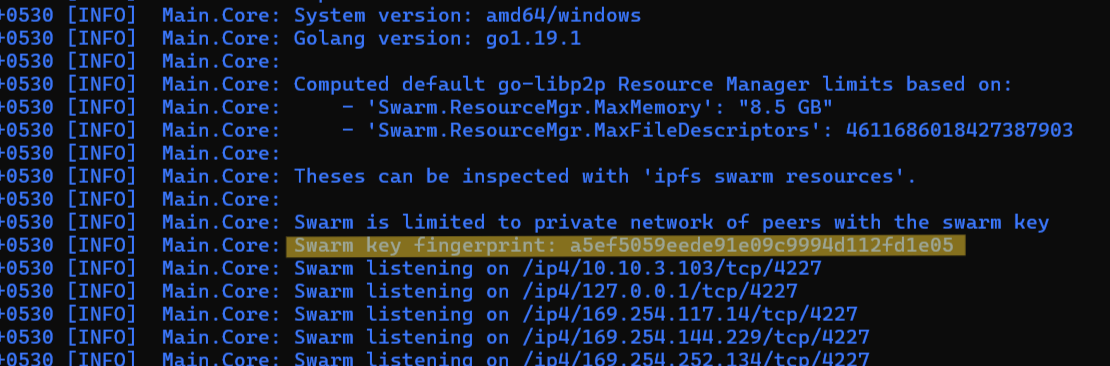
Ensure you are on the correct subnet by verifying the swarm key fingerprint in your node logs. (A subnet runs in localnet mode with a custom localnetswarm.key; see Set Up Your Subnet.)
In mainnet, the quorum is determined by the network. In a subnet, you choose and define the set of validators that make up the quorum. Each validator in the set must already be set up as a validator node:
- Running of Node
- Creation of DID
- Setup DID as a validator
These steps are the same as for mainnet (see the steps above). The difference is that the sender must register the chosen validator DIDs in its own quorum list.
Add each validator DID to the sender's quorum list, one at a time:
./rubixgoplatform addquorum -did <validator_did> -port <port-number>
Run this command once for every validator you want in the quorum. For example, to add five validators:
./rubixgoplatform addquorum -did bafybmiekur52zclpaf5pyq36dt62d6xrne6fqdkiy4xxi4nsrcxmy5hzla -port <port-number>
./rubixgoplatform addquorum -did bafybmiaxmyts7fzg7camoufqnv622p63edufaaktcwirivgljik2m5njai -port <port-number>
./rubixgoplatform addquorum -did bafybmic23w537mulew3bkfbu35irw4xwjvnardttxrraikeg2khgf32ovi -port <port-number>
./rubixgoplatform addquorum -did bafybmia52q45dowikjjwl7m6r2ffujxe4wh2nv5phpacsq7trfkgtfopbu -port <port-number>
./rubixgoplatform addquorum -did bafybmigo5anc2ltx2pmjxmxfpiw4dzs3ptufc72zusynl3lzyx4zqnvk3y -port <port-number>
After adding, confirm the quorum list using the command below:
./rubixgoplatform getallquorum -port <port-number>